 Chiro Lab
*This post contains advertising (affiliate links).*
You want to take your Raspberry Pi 5 out with you, right? I get it. So I put a UPS HAT that runs on two 21700 cells on mine, and it worked fine. Along the way, though, the cells looked like they were short on capacity, and I broke the board by putting a cell in backwards, so here's the story.
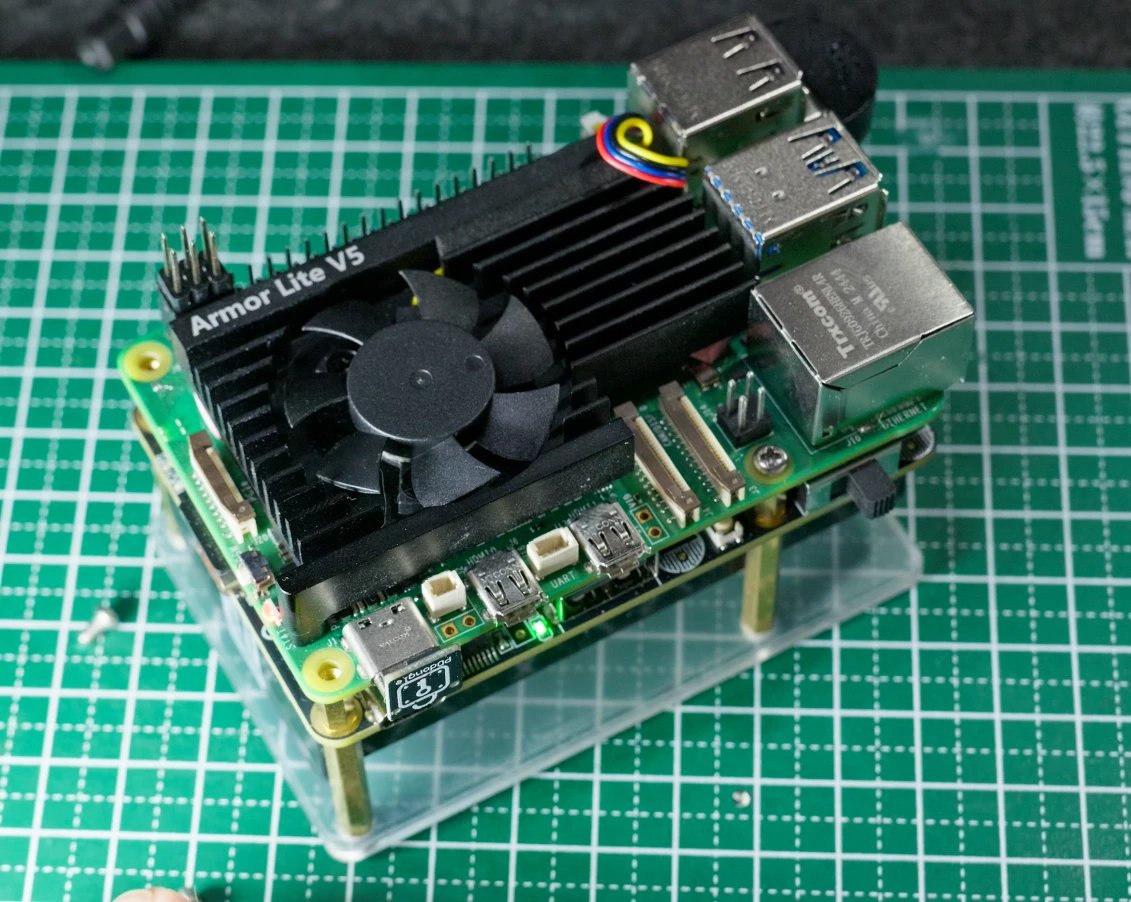
How I ended up using a UPS HAT
A UPS HAT is a battery board that stacks onto the Raspberry Pi. UPS stands for "uninterruptible power supply". While external power is connected, it powers the Pi and charges the cells at the same time, and when you unplug the power, it switches to the cells and the Pi keeps running without stopping.
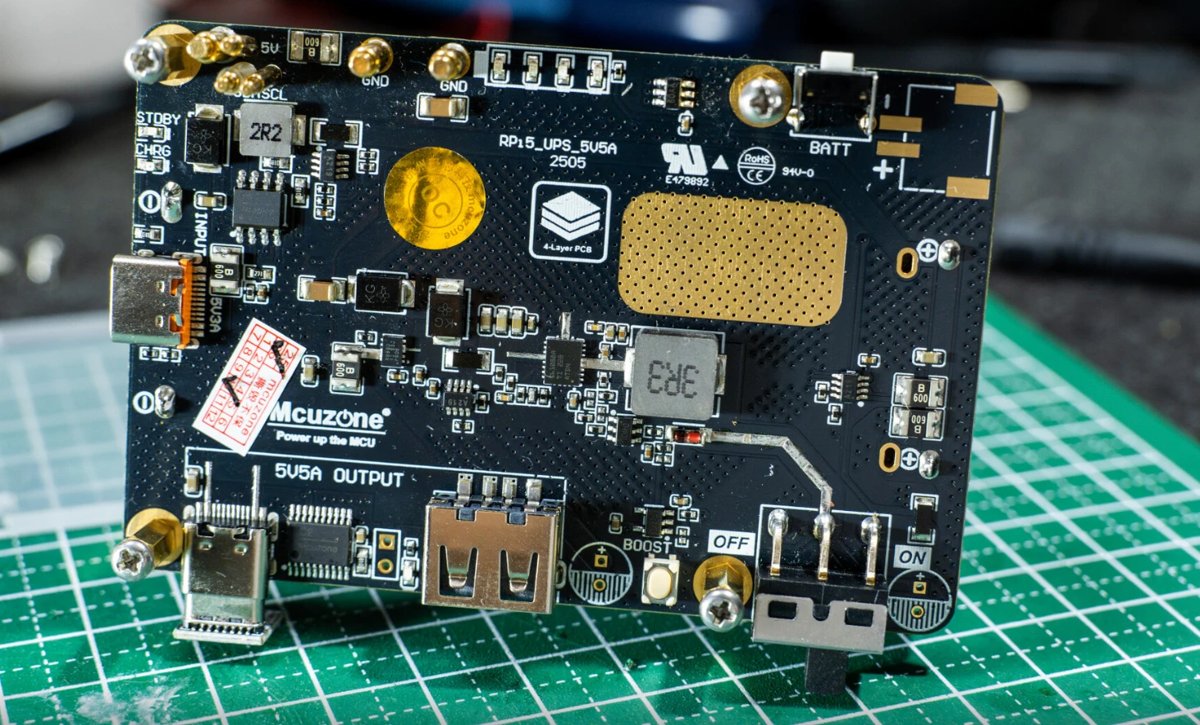
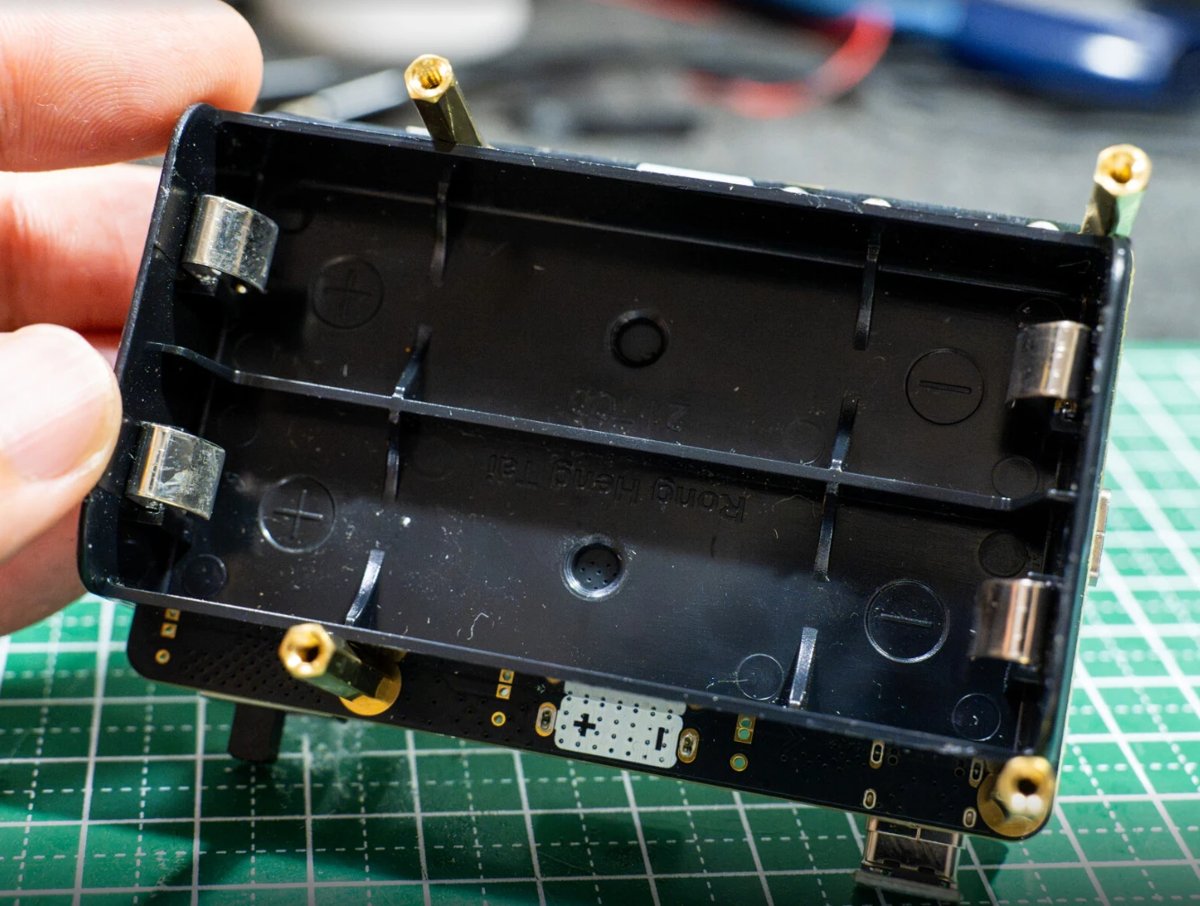
On the back, there's a holder for two 21700 cells.
I used to power the Pi from a power bank, but if I plugged a charging cable into the power bank while the Pi was connected, the power cut out for a moment and the Pi rebooted. I also felt the power wasn't quite enough when I used it while charging.
So I decided to try a UPS HAT, which powers the Pi straight from the cells and doesn't stop even while charging. The one I used is Mcuzone's "21700 5V5A PD UPS". It powers the Pi 5 from underneath through pogo pins, and I bought the set that comes with a PD Dongle. On top of powering the Pi, it can charge other devices too...! Pretty cool.
- UPS HAT: Mcuzone 21700 5V5A UPS (AliExpress)
- Cells: Molicel 21700 P50B 5000mAh 35A, set of 2 (Yahoo! Shopping, Japan)
The cells were sold as Molicel P50B, but the ones that arrived had a plain wrap that just says "21700 5000mah 3.7V" with no model number printed, so I haven't been able to confirm they're genuine. Their capacity did match the label, though (more on that below).
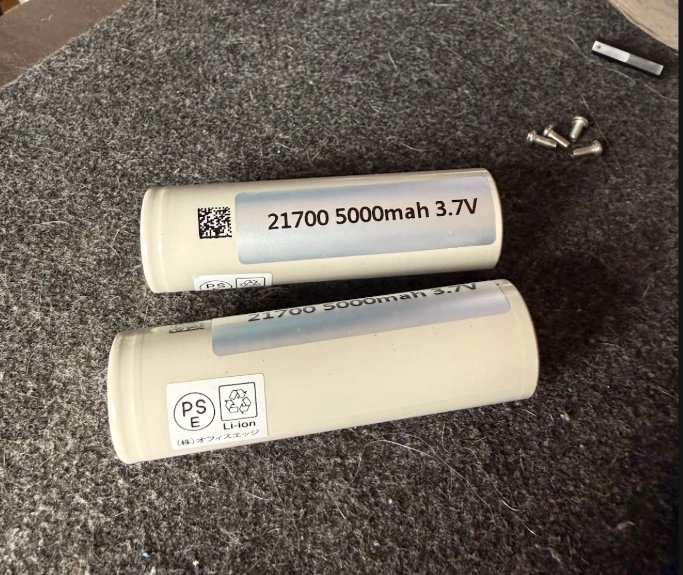
One thing to watch out for with this UPS HAT is the cell size. Lithium-ion cells come in lots of sizes, so be careful not to get the wrong one. 21700 is one of the larger sizes, and most of them these days seem to be around 5000mAh per cell.
With points and sales, I think the total came to about ¥8,000–9,000 (as of November 2026).
Putting it on
I put the two cells in, and it booted right up. The 5V output was around 5.1–5.2V, and there were no undervoltage warnings, so it looks fine.
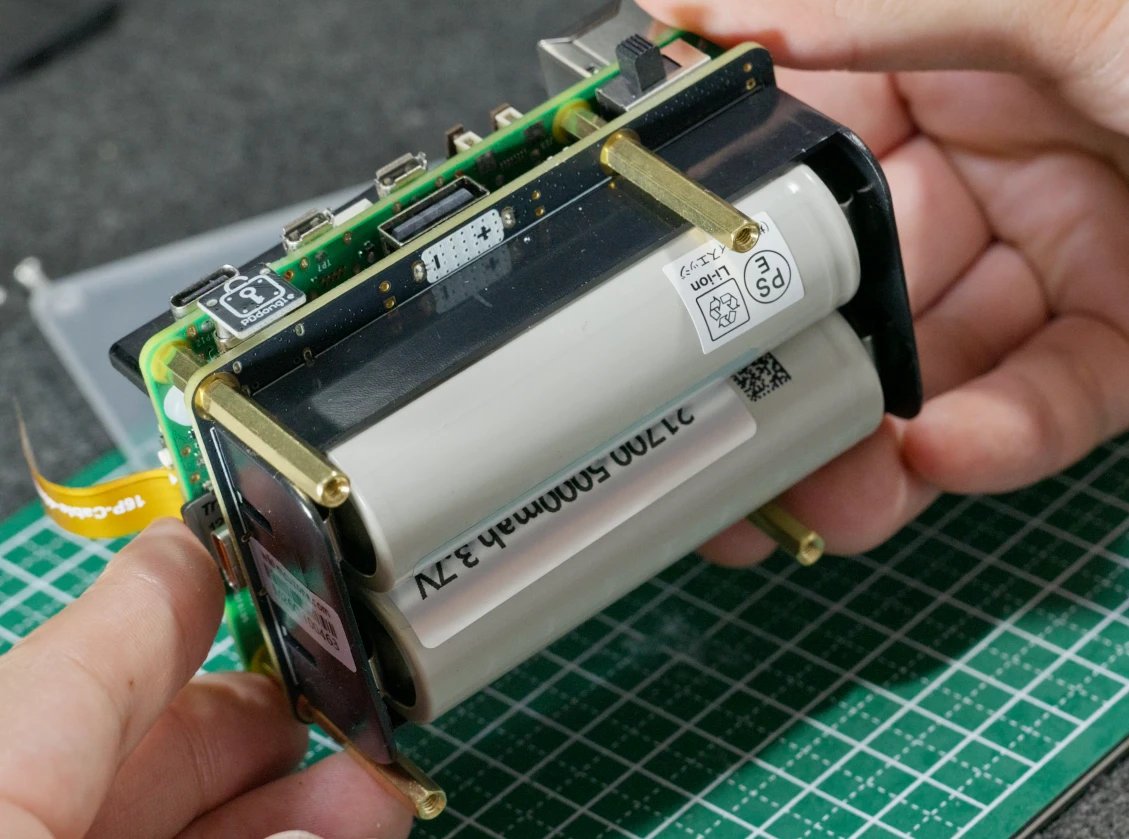
There was just one setting I needed. The Pi 5 talks to its power supply, and only when it finds out the supply can deliver 5V 5A does it relax the limit on how much current USB devices can draw. But this UPS HAT powers the Pi through pogo pins, so that conversation can't happen. The included PD Dongle plugs into the Pi 5's USB-C port to tell it the supply is 5V 5A, but in my setup, even with the PD Dongle, the Pi 5 still treated it as 5V 3A, so the current for USB devices stayed limited. Adding this one line to config.txt removes that limit.
usb_max_current_enable=1Note: The PD Dongle goes into the Pi 5's own USB-C port (the power port). I only noticed while writing this post, but in the photo above and the first photo, I'd plugged it into the UPS HAT's USB-C by mistake when taking the pictures.. When I was actually using it, it was plugged into the Pi 5 itself, and the Pi still treated it as 5V 3A. The UPS HAT has a USB-C port too, and once the boards are stacked they're close together, so I think it's an easy mistake to make.
A nice thing about this UPS HAT is that you can read voltage and current over I2C. It has sensors (INA219) in three places: the charge side, the discharge side and the 5V output. With these, you can show the battery level and power draw on your own control screen. I think an AI like Claude can build one for you easily.
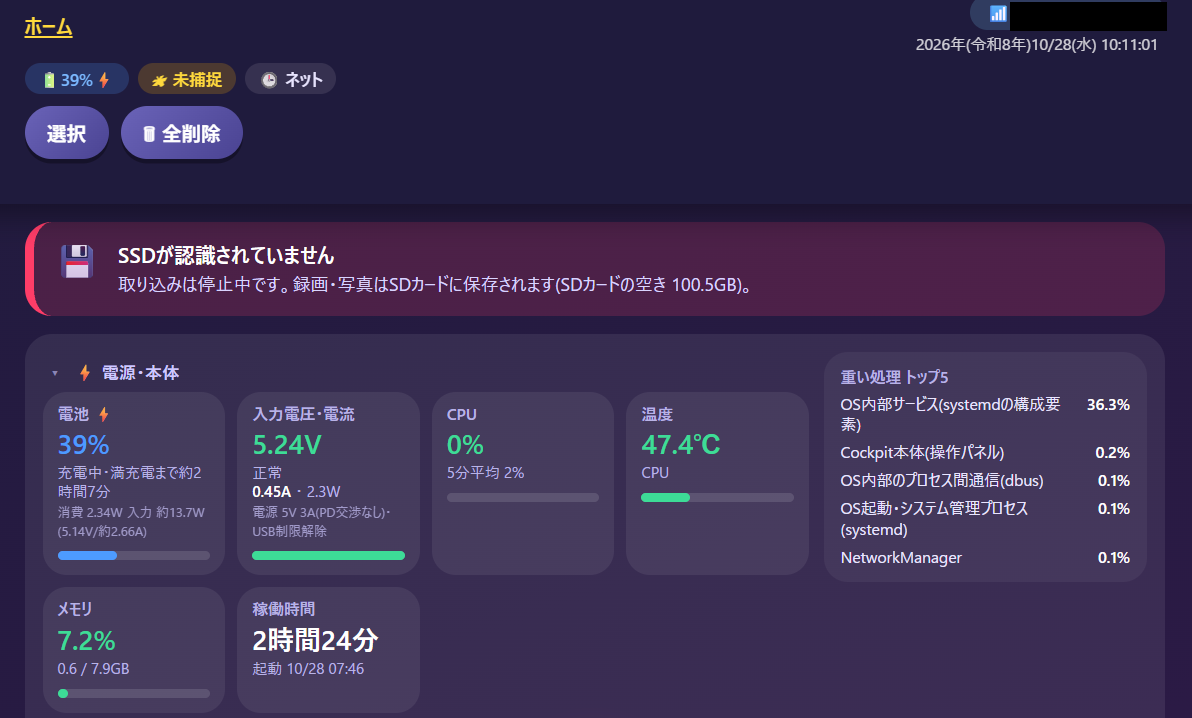
The sensor readings weren't right out of the box, though. When I compared them with a USB power meter in between, the 5V output side read almost exactly half, so you need to correct the values. If you want an accurate battery level, I think it's a good idea to check once with a power meter.
Not enough capacity?
I charged it fully and ran it on the cells alone overnight, and going by the sensor readings, the two cells only seemed to hold about 7,000mAh. Two 5000mAh cells should be 10,000mAh, so that's quite a bit less, right... The cells had no model number, just a simple sticker, so honestly I was a little suspicious..
So I bought a charger that can test the cells by themselves, and measured the capacity of each one. I used an XTAR VC4 Plus. It charges, discharges and charges again automatically, and shows how much capacity you could actually get out.
- Charger: XTAR VC4 Plus (Amazon.co.jp)
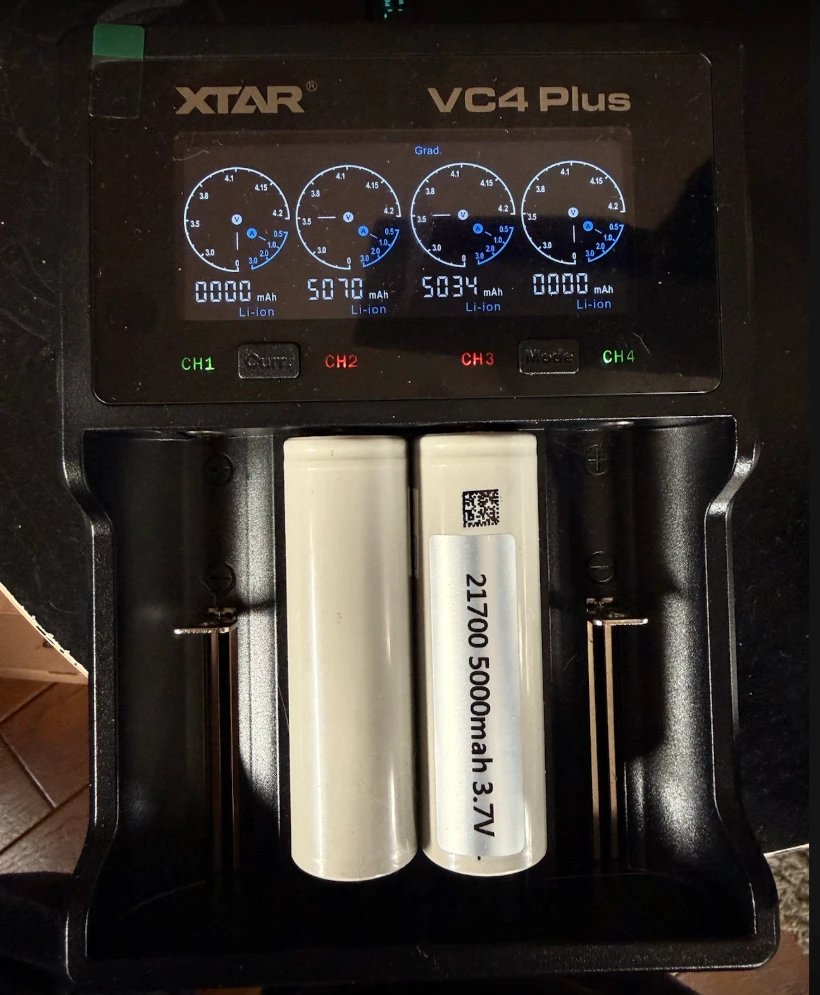
The results were 5,070mAh and 5,034mAh, so both matched the label. Internal resistance was 11mΩ and 14mΩ, which looks fine. Sorry for doubting you.
So the 7,000mAh reading seems to have been a problem with how the UPS HAT measures, not with the cells. I'm still looking into where exactly it went off.
I put a cell in backwards and broke it
This was entirely my mistake, but while putting the cells back in, I inserted one backwards, there was smoke, and the UPS HAT broke. I pulled it out right away, so the cells were OK, but the board no longer returns correct readings...
Orders from AliExpress take a while to arrive, and I'd waited about two weeks for this UPS HAT, so it was a shock.... While I was testing the cell capacity, I kept taking the cells out and putting them back in to measure the voltage, so that's what did it. Once they're in, I should just leave them in...
With 21700 cells, it's hard to tell which end is plus in the dark, isn't it? I recommend marking the plus side on both the cells and the holder. I ordered the same UPS HAT again right away, so I'll try again when it arrives...
Summary
It worked without problems for the few days before I broke it, so I think it's a good option if you want to carry your Pi 5 around on battery. I plan to record that this combination works on CompatRigs too.
When the new UPS HAT arrives, I plan to check again why the sensor readings were off. But that's another story.
Thanks for reading.
Comments